
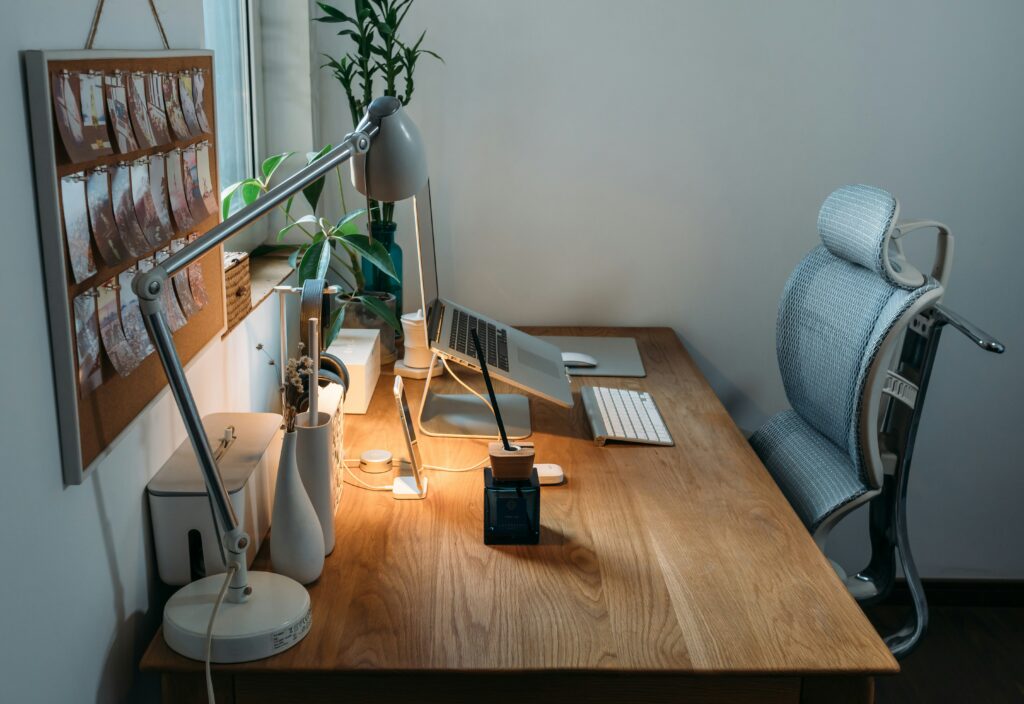
Most ergonomic setup advice reads like a shopping list — a chair, a stand, a monitor, a keyboard, a light, all presented as equally urgent. Nobody tells you what to do first if you can’t buy everything today. This isn’t a shopping list. It’s the order that gets you the most improvement for the least money and effort, starting from wherever you are right now.
If you already have specific gear picked out, this stays high-level on purpose — the detail for each decision lives in its own dedicated post, linked at the right point in the sequence below. What this page does is tell you the sequence itself: what to fix first, what to buy second, and what genuinely can wait.
Table of Contents
The problem with most “ergonomic setup” advice
Search for an ergonomic workspace step by step and you’ll mostly find lists of what a good setup should include — chair, monitor, keyboard, all treated as equally important, equally urgent. What’s missing almost everywhere is the order: what actually moves the needle first when you can’t buy all of it at once, and what depends on what. A $500 chair doesn’t fix a screen sitting six inches too low. A perfect monitor setup doesn’t matter much if you’re still typing hunched over a laptop keyboard. Sequence and dependency are the actual hard part, and that’s what this guide focuses on.
Your minimum viable route
If you’d rather skip ahead, here’s the whole thing at a glance:
| Step | What it involves | Why this order |
|---|---|---|
| 1. Fix habits | Posture awareness, regular breaks — free | Costs nothing, works immediately, no dependencies |
| 2. Build the laptop workstation | Raise the screen, separate keyboard and mouse — as one purchase | Highest impact for the money, once habits are in place |
| 3. Address chair and desk (if needed) | Only if your current setup blocks a neutral posture | Conditional — not everyone needs this first |
| 4. Add refinements | Monitor, lighting, headset, wrist rest | Real improvements, but not the foundation |
Step 1: Fix habits before buying anything
The first change costs nothing: noticing when you’ve been staring down at a low screen for an hour without moving, and doing something about it before it becomes automatic. Regular breaks and basic awareness of your position do more than people expect, and they work immediately — no shipping time, no unboxing.
The mechanics of why this matters, and which habits actually help, go deeper than what fits here — that’s the full subject of how to improve your posture while working on a laptop. What matters for this guide is simpler: get this part running before you spend a dollar on anything else, because everything in Step 2 works better once it’s not fighting bad habits underneath it. And Step 2 isn’t three separate purchases you make whenever — it’s one decision, which is where we’re headed next.
Step 2: Build a proper laptop workstation
Important: don’t treat this as two separate upgrades. Raising your screen while you keep typing directly on the laptop can leave you with a mixed setup that only solves part of the problem — it may improve screen height while leaving your hands and arms in a less comfortable position than before, not just an unsolved one. Buying a stand without a keyboard to go with it is the single most common way people spend money here and end up disappointed.
This is where the real return lives. Once habits are handled, raising the screen and separating the keyboard and mouse is one of the highest-impact ergonomic changes for the money — bigger, dollar for dollar, than almost anything in Step 3 or 4. The two pieces only work as a pair: the stand gets your eyes to a reasonable height, and the external keyboard and mouse let your hands stay at their own comfortable position instead of being dragged up with the screen.
If you’d rather not choose each piece separately, a complete laptop stand, keyboard, and mouse setup does exactly that — one stand, one keyboard, one mouse, already chosen to work together as a low-effort starting kit. That guide explains the technical how; this one is just making the case for why the pieces belong in the same decision, not two.
If you’d rather choose your own pieces, here’s where each decision lives: stability for a fixed desk that never moves, options built around neck and posture criteria if that’s your main concern, picks that fold down for a routine that moves between locations, or solid choices under $35 if budget is the tightest constraint. On the peripheral side, matching a mouse shape to your actual grip and finding a keyboard design that doesn’t force your wrists into a bad angle are the two decisions worth making deliberately rather than grabbing whatever’s cheapest.
Step 3: Address your chair and desk, if needed
This step is conditional, not automatic. Before assuming you need a new chair, check three things: can you sit with your feet flat on the floor, do you have at least some lower-back support — even temporary support can be better than having no support at all — and are your hips roughly level with or slightly above your knees? If those three hold up reasonably well, your current chair can wait, and Step 2 is worth doing first.
If your chair fails that check badly — if you’re perched too high, sinking into something with no support, or your feet dangle — fixing that moves ahead of Step 2, not behind it. A perfectly positioned screen doesn’t help much if the chair underneath you is actively working against a neutral posture. Choosing a chair that actually fits your body and making small ergonomic desk setup adjustments are the two places to start once you know this step is genuinely necessary for you.
Step 4: Add refinements once the basics are solid
Once the first two (or three) steps are handled, these are real upgrades, just not the foundation: a second screen that takes the pressure off constantly switching windows, lighting that stops your eyes from working harder than they need to by the end of the day, headphones comfortable enough that a three-hour call doesn’t leave your ears aching, and a small pad that keeps your wrists from resting on a hard desk edge for hours at a stretch. None of these replace a solid foundation — they make a good one better.
If your situation is different
The route above works for most people, but two situations call for a different starting point entirely — not a fifth step, a different set of constraints.
If your limit is the total amount you can spend across everything, not just one piece at a time, a complete setup built around a fixed budget approaches the whole question differently — the order matters less than staying under the number you’ve set. And if the entire point is that your setup needs to travel with you, building an ergonomic kit for travel deals with a different trade-off than anything above: what fits in a bag, not what’s ideal for a desk that never moves.
Frequently asked questions
Where should I start when building an ergonomic workspace?
With habits, not purchases — noticing your posture and taking real breaks costs nothing and works immediately. After that, the laptop stand, keyboard, and mouse together are the highest-impact purchase, ahead of a new chair for most people.
What is the correct order to set up an ergonomic workstation?
Habits first, then the laptop workstation as one decision, then your chair and desk only if they’re genuinely blocking a neutral posture, then refinements like a monitor or better lighting. The order is based on cost and impact, not on what feels most exciting to buy.
Should I buy an ergonomic chair or a laptop stand first?
It depends on your current chair, not on a fixed rule. If your chair already allows a reasonably neutral posture, the laptop workstation comes first — it’s the bigger win for the money. If your chair actively prevents that posture, fixing the chair takes priority. Either way, the answer is never “just the stand, without the keyboard and mouse.”
What is the most common mistake when setting up laptop ergonomics?
Buying a laptop stand without separating the keyboard and mouse is one common mistake. Raising the screen alone changes where your neck is working, but your hands are still tied to wherever the laptop’s built-in keyboard ends up — which is now higher and more awkward than before, not fixed.
How can I make my laptop ergonomic without spending money?
Start with posture awareness and regular breaks — both are free and make a real difference on their own. A stack of stable books can approximate a laptop stand temporarily, though it won’t hold up as well as a real one once you’re ready to invest in the keyboard and mouse that go with it.
Is it worth buying an external monitor if I work on a laptop?
For many people, yes, but it’s a Step 4 upgrade, not a starting point. It solves a different problem — screen real estate and reduced window-switching — than the neck and wrist strain that Steps 1 and 2 are built to address first.
The bottom line
An ergonomic laptop setup isn’t something you build all at once — it’s something you build in the right order. Fix habits first because they’re free. Build the laptop workstation next because it’s the biggest return for the money. Address your chair only if it’s genuinely working against you. Add the rest once the foundation actually holds.
Every specific decision — which stand, which chair, which mouse — has its own dedicated guide elsewhere on this site. This one exists for a single job: helping you figure out what to do first.